If you do at home blood tests, like testing your blood sugar, pricking your finger with a lancet or lancing device is the method used to obtain blood for testing. There are two ways. You can use a lancet or a lancing device. The lancet can be used on its own or you can use it in conjunction with the lancing device.
A lancet is a small, sharp needle used to puncture the skin and draw a drop of blood, typically from the sides of your finger. A lancing device is a small tool that consists of a housing that holds a lancet. Most lancing devices allow you to adjust the depth of the puncture, which can be useful for different skin types.
Whether you use a lancet by itself or choose to use a lancing device, here is a guide to help you use a lancet or lancing device for testing glucose or any other test effectively.
Guide to Pricking Your Finger With a Lancet or Lancing Device
Gather Your Supplies
Before you start, make sure you have everything you need:
- Lancing Device: Used in conjunction with lancet
- Lancet: A new, sterile lancet.
- Glucose Meter: Ready for testing.
- Test Strips: Compatible with your glucose meter.
- Alcohol Swabs: For cleaning the finger before pricking.
- Cotton Ball or Gauze: To stop any bleeding after the prick.
- Sharps Container: For safe disposal of used lancets.
Wash Your Hands
Clean hands are crucial for an accurate reading and to prevent infection. Wash your hands with warm, soapy water, and dry them thoroughly. Clean hands also help ensure that the blood sample is free from any contaminants, which could affect the test results.
Prepare the Lancet or Lancing Device
a. If Using a Manual Lancet:
- Remove the Cap: Take off the protective cap to expose the needle.
- Grip the Lancet: Hold the lancet firmly but comfortably in your hand.
b. If Using a Lancet with a Lancing Device:
i. Load the Lancet
- Insert the Lancet: Unscrew the top of the lancing device to expose the lancet holder. Insert a new lancet into the holder.
- Remove the Lancet Cap: Twist off the protective cap from the lancet, exposing the needle.
- Replace the Device Cap: Screw the top of the lancing device back on securely.
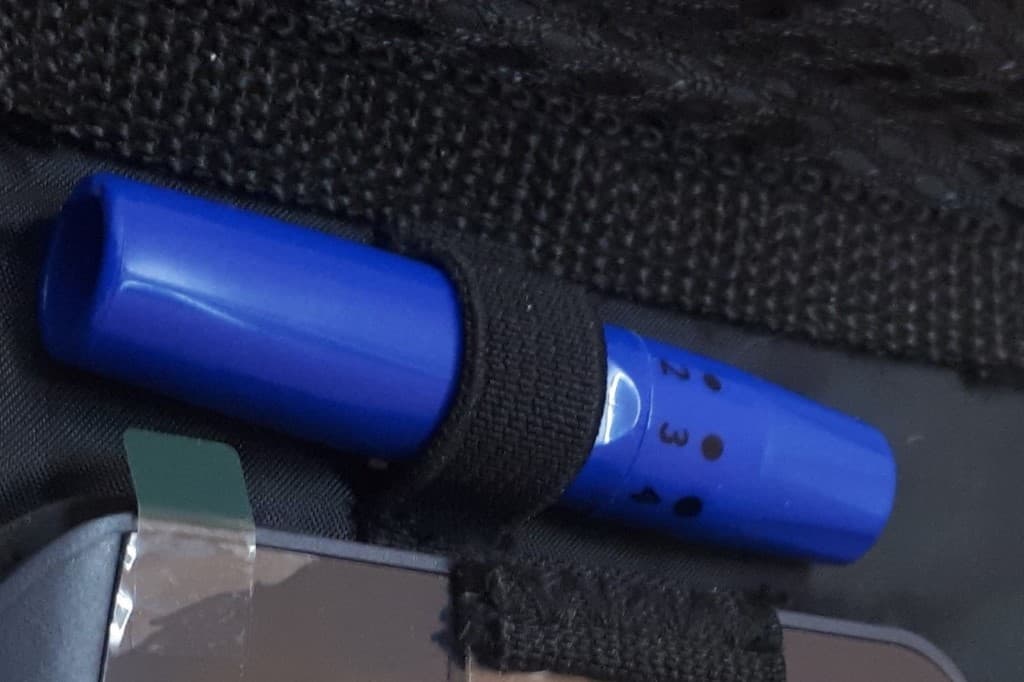
ii. Set the Depth
Adjust the depth setting on the lancing device. Most devices have multiple settings, ranging from shallow to deep. Start with a middle setting and adjust based on your comfort level and how much blood you typically need.
Choose Your Puncture Site
a. Select a Finger
The sides of the fingertips are the best sites for pricking because they have fewer nerve endings than the pads, making the process less painful. Use your third and fourth fingers for best results according to WHO.
b. Rotate Fingers
To avoid soreness and calluses, rotate between fingers each time you prick. This gives each finger time to heal before the next prick.
Prepare the Finger
a. Warm Your Hands
If your hands are cold, it might be harder to get a sufficient blood sample. Rub your hands together or run them under warm water to increase blood flow.
b. Clean the Area
Use an alcohol swab to clean the side of your fingertip where you’ll be making the prick. This reduces the risk of infection. Allow the alcohol to air dry completely before proceeding to avoid stinging and to ensure the alcohol does not affect the blood sample.
Perform the Finger Prick
a. Position the Lancet or Lancing Device
- If Using a Manual Lancet: Hold the lancet against the side of your fingertip. Position it so that the needle is ready to make contact with the skin.
- If Using a Lancing Device: Hold the lancing device firmly against the side of your fingertip. The pressure should be firm but comfortable.
b. Prick Your Finger
- Manual Lancet: Quickly and firmly press the lancet into your skin to create a small puncture. The motion should be swift to minimize pain.
- Lancing Device: Press the release button on the lancing device to activate the lancet and prick your finger. You should feel a quick, light sting.
Obtain the Blood Sample
a. Form a Blood Drop
After the prick, gently squeeze your finger from the base towards the tip to encourage a drop of blood to form. Avoid excessive squeezing, as this can affect the sample’s quality by mixing tissue fluid with the blood.
b. Apply Blood to the Test Strip
Touch the edge of the test strip to the blood drop. The test strip will automatically draw the blood into the glucose meter for analysis. Ensure you apply enough blood to fill the test strip’s sample area; otherwise, you may receive an error message and have to repeat the process.
After the Test
a. Stop the Bleeding
Use a cotton ball or gauze to apply gentle pressure to the puncture site until the bleeding stops. Most small punctures will stop bleeding within a minute or so.
b. Dispose of the Lancet Safely
Place the used lancet into a sharps container immediately after use. Never reuse a lancet, as this increases the risk of infection. Use a new, sterile one each time you prick your finger.
Record Your Results
If you are monitoring blood glucose levels, record your results in a logbook or digital app. Keeping track of your readings can help you and your healthcare provider manage your diabetes more effectively.
Tips for Reducing Discomfort
- Adjust the Depth: If the prick is too painful or doesn’t produce enough blood, adjust the depth setting on your lancing device or use a different technique with the manual lancet.
- Rotate Sites: Regularly change the puncture site to avoid soreness and develop calluses.
- Use a Fresh Lancet: Always use a new, sharp lancet for each test to minimize discomfort and reduce the risk of infection.
Pros and Cons of Lancets and Lancing Devices
When it comes to pricking your finger for glucose testing or other at home tests, choosing between a manual lancet and a lancing device can significantly impact your comfort, ease of use, and overall experience. Both tools have their unique advantages and disadvantages, depending on your personal preferences and needs. Below, we’ll break down the pros and cons of lancets and lancing devices to help you with your decision.
Pros of Lancets:
- Precision Control: When used manually, lancets offer direct control over the depth and location of the puncture. This can be beneficial for people who have developed a technique that minimizes discomfort.
- Simplicity: Lancets are straightforward tools with no moving parts or complicated mechanisms. They are easy to use and require minimal setup.
- Cost-Effective: Lancets are typically less expensive than lancing devices, making them a budget-friendly option for those who need to test their blood glucose frequently.
- Less Bulk: Lancets are small and easy to carry, making them a convenient option for travel or when you’re on the go.
Cons of Lancets:
- Pain Management: Without a lancing device, it’s harder to control the puncture depth, which can lead to more pain or discomfort, especially if you don’t have experience using them.
- Safety Concerns: Handling a lancet manually increases the risk of accidental injury or contamination, especially when changing or disposing of the lancet.
- Inconsistent Results: Without the controlled mechanism of a lancing device, it might be challenging to obtain a consistent blood sample every time, potentially leading to errors or the need for multiple pricks.
Pros of Lancing Devices:
- Adjustable Depth Settings: Most lancing devices come with adjustable depth settings, allowing you to customize the puncture depth based on your skin type and comfort level. This feature can significantly reduce pain and make the experience more comfortable.
- Ease of Use: Lancing devices are designed to be easy to use, with a simple press of a button triggering the lancet. This consistency helps ensure a reliable blood sample with each use.
- Safety: The lancet is enclosed within the device, reducing the risk of accidental pricks. After use, many lancing devices have a mechanism for safe removal and disposal of the lancet, minimizing the risk of injury or contamination.
- Reduced Discomfort: The controlled motion and speed of the lancing device can reduce the sensation of pain compared to manually using a lancet.
Cons of Lancing Devices:
- Bulky: Lancing devices are larger and less portable compared to individual lancets, which might be inconvenient for people who need to carry them around.
- More Expensive: Lancing devices are generally more expensive than lancets alone, though they are often reusable and may offer long-term value.
- Device Maintenance: Unlike simple lancets, lancing devices require regular maintenance, such as replacing the lancet, cleaning, and ensuring that the device is functioning correctly.
- Limited Control: While adjustable, lancing devices might not offer the same level of precision as manually using a lancet, especially for those who have developed a specific technique.
Conclusion
Using lancets or lancing devices are very common. Knowing how to use them effectively and produce the best results is important as testing is done at home. Always follow the instructions provided to you by the manufacturer of your device so that you are using your equipment properly and making the most of it.
Reliable testing and accurate results depend on you following instructions carefully.